Well, I missed Day 1 of the Knitting & Crochet Blog Week, but here I am to participate fully in DAY 2!
I used to publish a lot more photographs of my work in progress, but limits on energy and fears about releasing some editorially-secure information have made me less photo-happy.
This is a shame as I ADORE photography almost as much as I love yarn and fiber crafts. This is probably why I was an early adherer to Pinterest (check out my boards under modeknit) and LOVE to see what other folks put in their flickr accounts (I’m also there under modeknit)
I use my photography as part of my job, to tell the story of my work, and to ‘sell’ a design. I usually take a LOT of in-process photographs (which usually never see the light of day and are hidden away in my iphoto album) so I can recreate a technique or use it to create a line-drawing illustration.
To be honest, by the time a design is published I’m generally so involved in current projects that I have a hard time getting excited about digging up those old process photos and publishing them – but that’s exactly when I should be making them public!

I’ll often photograph or scan a swatch so I can isolate a repeating stitch pattern, shrink it, then ‘wallpaper’ it into one of my electronic sketches to present an eerily realistic vision of how I see the final garment.
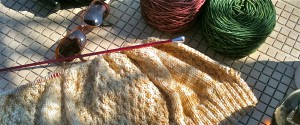
But generally I’m relegated to tight little closeups of a garment (no revealing full body shots) or beauty shots of yarn.
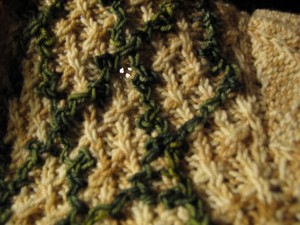
For instance, I don’t think I’d be giving TOO much away to show how I’m using an all-0ver cable/trellis pattern to create a framework upon which I build a rose-garden of decorative chain embroidery & french knot roses.

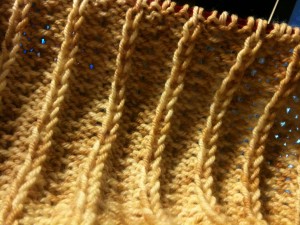
Here’s the fabric, with the trellis being worked over the center front and center back of the garment (the sides, where the shaping is taking place, are worked in stockinette stitch to prevent a murder-suicide in the knitting community)

Once the trellis pattern is established, it’s relatively simple (remember, simple does NOT mean easy) to work a decorative chain using a crochet hook along the trellis grid. I’ve tried to wiggle the line, making an irregular vine pattern here.

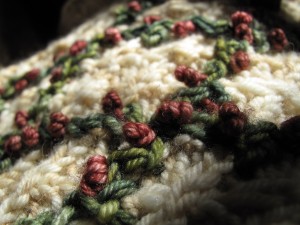
Then I add French knots along the green vines to create tiny rosebuds. Some of the knots are formed using 5-wraps, some are as small as 3-wraps (not all roses are the same size!)
The result is a lot of bang for the buck, and a chance for knitters to expand their horizons in a non-threatening way.
You don’t have to be a mistress-embroiderer to make this look good, and if you’d decide to just forego the embroidery you’d still have a lovely cardigan with a nice cable/trellis pattern strategically placed to be very flattering.


I love seeing your photography, and the trellis is lovely!
Wow… that is lovely. I like the closeups too. Nice pictures.
I was like wait a minute…I know this woman. I took your class at Interweave Knitting Lab last year. You’re a great and hilarious teacher, Anne.
Lovely close shots of your work. You are so patient to embroider on top of knitted fabric after knitting all of that.
Thank you for your kind comments on my teaching – that was a FUN event!
Wow, that looks really pretty, very good idea to embroider on knitted fabric !
Very pretty closeups! Would deliberately blurry photos work? Just wondering, as I’ve seen photos of things like quilt patterns for sale that are clear enough you can see what it looks like, but blurry enough that you can’ts see the details.
I had to think about “mistress-embroiderer”. Then I realized you probably meant the feminine form of “master-embroiderer”, not how the word mistress is usually used these days.
Annie, look at this video as though you were someone else. So PR did not respond. That’s their loss, truly. If this technical voice/video thing is a problem perhaps one of the kids could help, because you come across well and the list of accomplishments is impressive. Sometimes people who are committed, rigorous, and learned are not what is being sought when entertainment is the goal. Do not be discouraged. Look upon this video as a trial run. Best,BER